Topic Covered in This Page
- How Do I Run a Diagnostic Test on My Computer?
- Generate a Windows 10 System Diagnostics Report
- Diagnostics Tools to Check Your PC’s Health
- How to run hardware diagnostics on windows 10
- Microsoft diagnostic tool windows 10
- PC & Laptop diagnostic test
- Windows diagnostic startup

In this article, we explains how to run diagnostics on your system (eithere on Windows 10 or Windows 11).
Windows Diagnostics refers to a set of tools and processes within the Windows operating system designed to identify and troubleshoot issues affecting system performance and stability.
These diagnostics tools help users pinpoint problems related to hardware, software, or network connectivity. Examples include the Windows Memory Diagnostic for RAM testing, Disk Check for identifying and repairing disk errors, and the Event Viewer for examining system logs. Windows Diagnostics aims to assist users in diagnosing and resolving issues to maintain a smooth and efficient computing experience.
Windows comes with a built-in diagnostic tool
On Windows 10 and 11, there are several ways to generate system diagnostics reports. In addition to built-in Windows choices, many hardware manufacturers provide troubleshooting tools, and third-party software are available for diagnosing computer hardware issues.
How Do I Run a Computer Diagnostic Test?
If you can’t figure out what’s wrong with your computer, use the Windows Troubleshooter:
The screenshots below are from Windows 10, but the instructions are also applicable to Windows 11.
Step 01 –
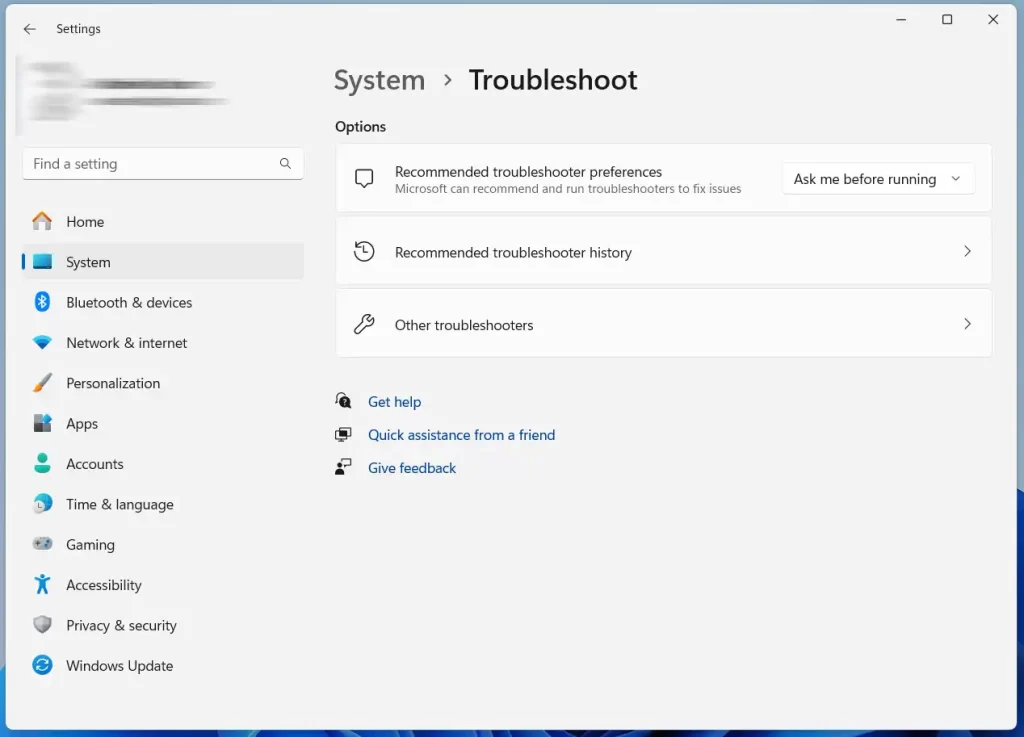
On Windows 11, go to Settings > System > Troubleshoot. On a PC with Windows 10, go to Settings > Update & Security > Troubleshoot.
Windows 11 users have an extra step: Select Other troubleshooters.
Styep 02 –
Choose a troubleshooter for your problem. Options include Bluetooth, Keyboard, Windows Update, and Network and Internet.
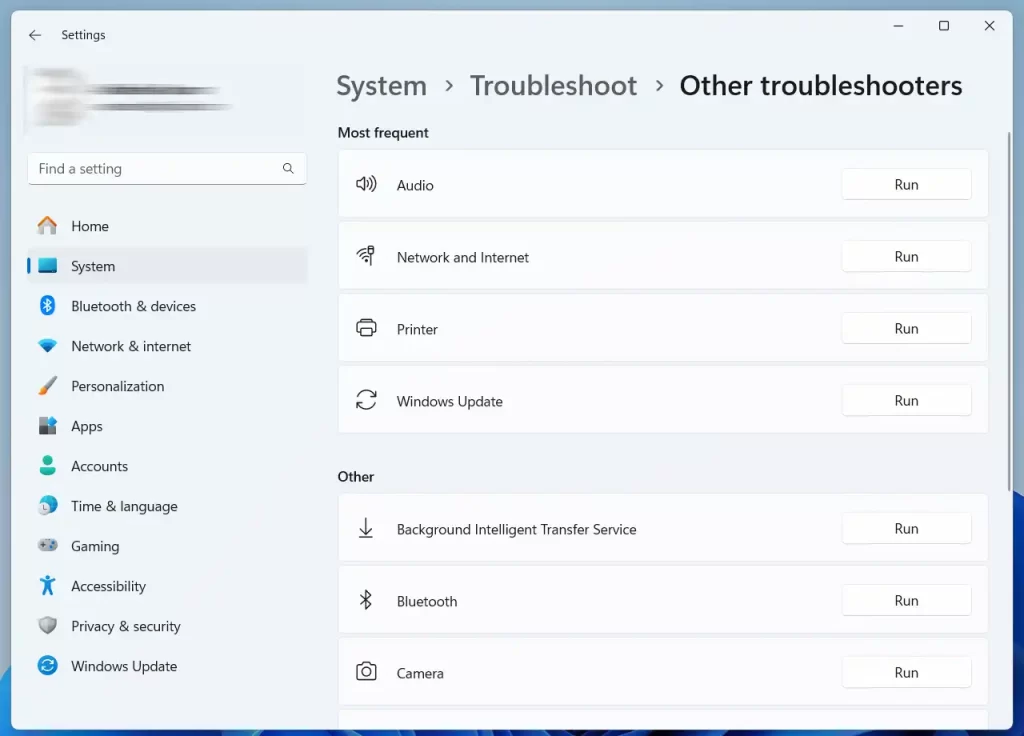
If the troubleshooter finds a problem, it will suggest how you can fix it. You may be able to resolve the issue by automatically repairing Windows.
How to Use the Windows Memory Diagnostic Tool
If your computer programs keep lagging or freezing, there could be a problem with your RAM. Your best bet is to run Windows Memory Diagnostic:
Step 01 –
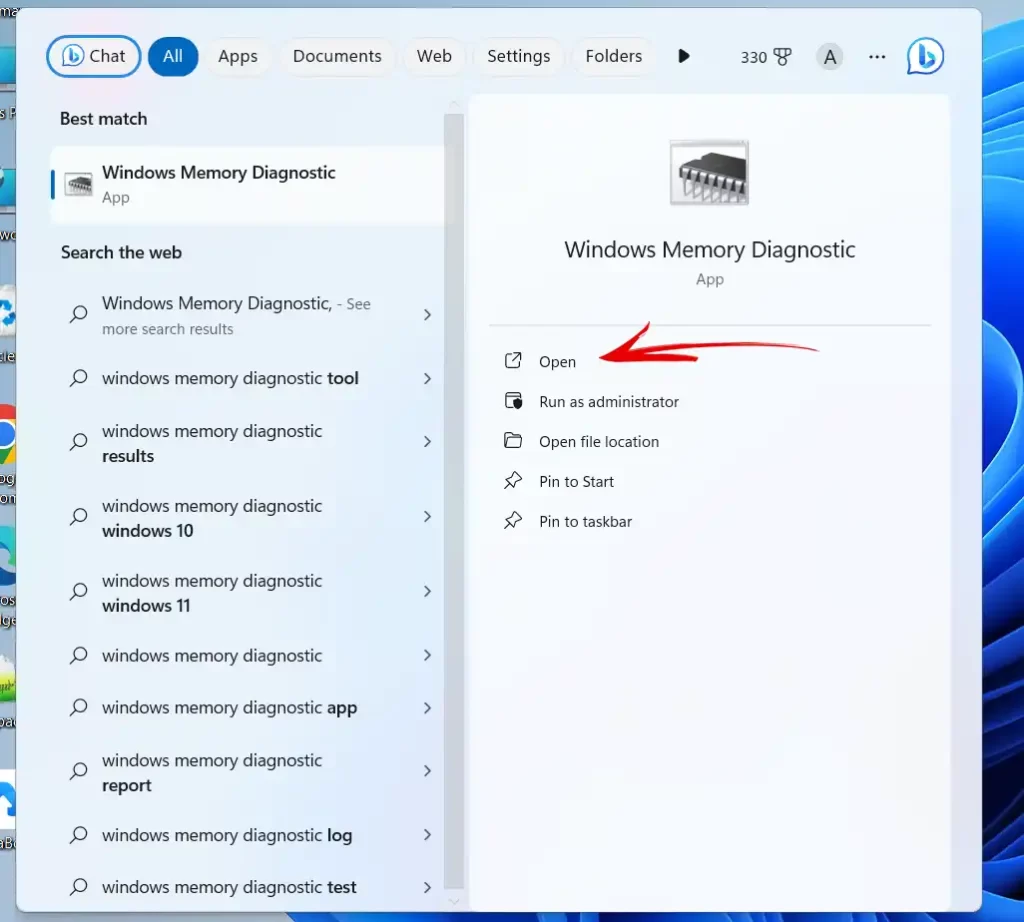
Open the search tool on the taskbar, enter Windows Memory Diagnostic, and then select the app to open it.
Step 02 –
Select Restart now and check for problems or Check for problems the next time I start my computer. When your PC restarts, the Windows Memory tool will scan your computer.
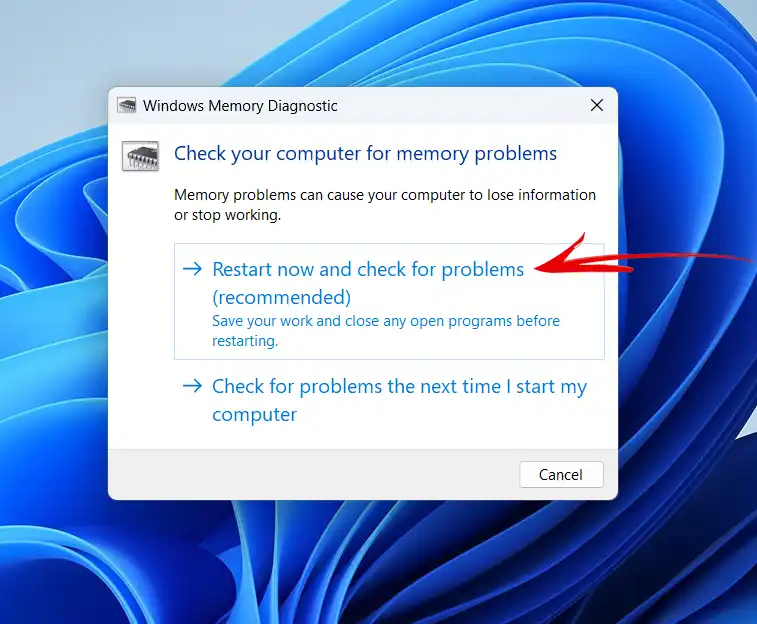
Step 03 –
After a few minutes, your PC will boot as normal. Review the results in Event Viewer. If the troubleshooter finds any problems, take action to free up memory.
There are also third-party memory test programs that may have more features than the default Windows tool.
Other Third Party Computer Diagnostic Tools
Another option to obtain help in Windows is to use the obtain Help app to contact Windows Support. Third-party programs are also available for debugging specific devices, such as your display. Conduct thorough investigation and scan anything you download for malware.
Your CPU and other components may include diagnostic software. The Intel Processor Diagnostic Tool, for example, can evaluate and improve Intel CPUs. Dell computers also have a variety of diagnostic tools. Check your PC for any additional built-in diagnostic applications.

This article will guide how to run windows inbuilt PC Diagnosis tool. If you are facing any issues with windows diagnosis, call us for assistance. Our service engineer will certainly guide you. You can also ask for a free PC Diagnostic Service


